

Behind the Scenes: Allan Purvis - Trouble (Part 2)
- Mar 24, 2020
- 7 min read

If you're joining me today from yesterday's blog post, you will have read about the recording process behind the music video for Allan Purvis' new release "Trouble" as part of his upcoming EP, Lovable Scamp!
With the recording finished, it's time to look at how I tackled editing the video and the creative decisions and liberties I took in order to have the final product looking the way it does today!

Shortly after the recording had wrapped up on Saturday 14th March, I immediately went back to my home studio to begin working on the editing, copying all of the video clips we had captured over the past 2 weeks onto my PC and loading up Adobe Premiere Pro 2020.
Danny at dB Audio was dealing with the mixing and mastering of the tracks while I worked on the video, so as I had to wait for the final mix and master of "Trouble" Danny sent me over a rough mix he crafted that would be changed over time to become more polished and refined for official release.

The video quickly took form relatively quickly as I had ideas for some clips to bleed and blend in and out of each other with smooth transitions while other clips featured more harsh transitions and distorted visuals. My initial idea was to have the video be in black and white, similar to the music video for Oasis' "Wonderwall", however I felt like this was too clichéd and over-used.
Instead I decided to opt for a mix of saturated visuals to display a sense of vibrant professionalism and distorted incorrect visuals to showcase the more troubled side of the song via the lyrics mentioned in the previous post.

This led to me adding a VHS-like effect to the troubled clips and heavy saturation and contrast to the live performance clips so that they contrasted massively with each other and show two sides to the story.
However this led the studio footage in a peculiar place, as placing VHS distortion over the clips would give off the wrong impression of those being the troubled clips with full on distortion.

As a result, I decided to blend the two, giving the studio clips slight saturation to make them appear warmer, but adding in film grain and blur to slightly offset the clips so as to almost make the footage seem bootleg in its nature and appear as if Allan still has mental frustration to deal with, but is finally able to release it in the form of music.
Achieving these effects at first was quite the task for me, as I had never utilised a VHS effect before, so I had to rely on multiple tutorials to achieve the best effect possible.

The plugins I made use of for the VHS effect were Lumetri Colour for adding a false colour into the shots, adding a particularly off-green tint, two Channel Blurs, one adding a Green Blur and another adding a Red Blur, giving the distinct look of an incorrect video clip with colour artefacts, Unsharp Mask to slightly sharpen the blurred footage, giving it a slightly dull but still visible look, and Noise to add film grain and small-scale static to the clips.
For the studio footage, I only utilised Lumetri Colour and Noise, to add some slight saturation warming the footage up, and to add film grain/static to give off the sense that the footage is almost bootleg and behind the scenes itself, while still signifying the intensity of a given part of a song.

Noise in particular was a plugin I very much revelled in using for the video, as I was able to increase or decrease the film grain on screen for any given shot to truly emphasise the intensity of it. You may notice that in the pre-choruses, in particular the second pre-chorus, the film grain on the studio footage of Allan singing is quite noticable, and this is to further emphasise the tension of the lyrical message, but also the intensity of the song during the pre-chorus, helping carry it beyond into the chorus itself.
This was a technique I had learned about from the Silent Hill series, namely 2 and 3, in which scenes that have more focus on trauma, tension or horror are accented with heavier emphasis on film grain to increase the tension within the player/viewer.
I utilised this in the same way, albeit in sections of the song and video where the tension and dynamics of the song are increased, helping to drive the theme and the emotion of the song and video forward to the viewer.
With the troubled and studio footage added with the VHS effect, there was still one other group of clips I had to add effects to; the on-stage clips.

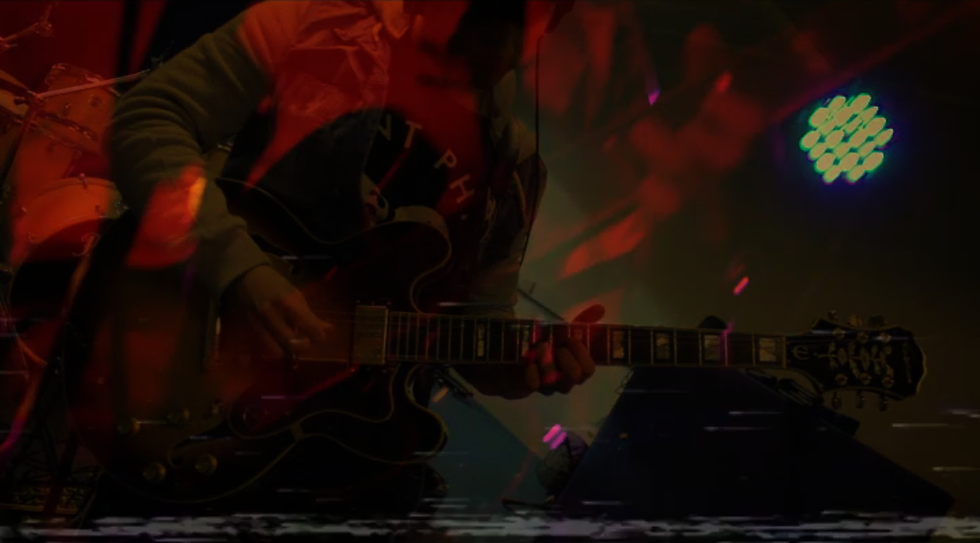
For this, I utilised Lumetri Colour to saturate the footage overall, increasing the colour and depth of colour, and Brightness & Contrast, to increase the contrast so that there is less grey in shots and more depth so that bright colours pop out more.
It was fairly minimal, however the shots benefit massively from it, leading to the stage shots being bathed in hues of pinks, reds, blues, and greens, making the clips feel vivid and bursting with life.
However there was still one last thing to add; despite adding in the VHS effect, I was still unhappy with how it looked as there was no visual indication of the footage being truly warped or broken. I was looking to add VHS glitches.
Thankfully I finally found some for free on YouTube recorded by Christopher Huppertz and Pauls Vids.

By adding this effect in, it creates a better visual representation of damaged or outdated video footage that works perfectly for the troubled sections showing Allan's outward mental frustration.
To achieve this, I placed sections of the VHS glitch on top of the desired clips; normally this would cause the VHS glitch itself to just override any video clip below it, meaning that only the VHS glitch would appear, and this happened initially.

However, by going into the Opacity of a clip and setting the Blend Mode to Screen, it will cause only the brightest artefacts of the video to appear, erasing the black screen background that the VHS glitch videos had contained with them.
This means that placing the VHS glitch over the desired footage while the glitch is set to Screen in Blend Mode, it will overlay itself on top of the video and give the true VHS effect I desired for in the first place.

With the effects covered, I should briefly mention the editing style I opted for with the video; as this is a music video, one thing to keep note of is a consistency of rhythm. If edits are made a bit too loose, it can sometimes feel a bit detached to the source material the video is made for.
As a result, most of the hard cut transitions from scene to scene were made to fit directly on the beat of the song, meaning that the song and video flow together and don't become detached from one another during pivotal moments.
A perfect example of this is during the lead up to each pre-chorus; the shots seen are shown in quick succession, but in perfect time with the drum and cymbal hits leading into the pre-chorus.

This helps carry the weight of the end of each verse into the bombastic pre-chorus, engaging the listener and the viewer in what is happening on screen.
Outside of the sharp cuts, I utilised smoother transitions for sections that needed it, in order to both diversify the transition composition and to ease viewers into some shots and scenes without constant harsh cuts that can be made stale if overused.
One transition I was happy with was the previously mentioned bench shot in the previous blog post; the idea of having the clips of Allan in the studio and Allan on the park bench blending into each other added a great sense of the two stories or paths crossing, and I tried to use the same transition again two clips after as Allan was sitting in the cafeteria struggling to write the lyrics to the song and getting frustrated as footage of him performing on-stage blends in the foreground.

However my favourite edit comes from immediately before the second verse when I asked Allan to look truly frustrated and to smack the camera from his path; as he smacked it from the right, there was a perfect piece of VHS glitch that had distorted artefacts appearing mostly at the right side of the screen; this matched up perfectly with the shot of Allan smacking the camera, and I found footage from the live performance of the camera swinging with the lights blurring by in the background.
The edit makes it look as if the footage and camera has been affected that badly that it has jumped to another section of the video unintentionally, causing significant distortion and video issues that coincide greatly with the theming of the song and the video.
After the second chorus, I had the guitar solo at the end of the song blend between the studio performance and the on-stage performance, before leading outwards to Allan walking off as the camera blurs and fades to black. This was to emphasise the idea of the video being corrupted and switching between the two different versions of the solo.
After the final scene of Allan walking off, the video ends with the glitching continuing for another couple of seconds before disappearing and ending the video.
Now that the video was done, I had to get the official master from Danny, import it into the video in place of the rough mix, and then render and export it!
The music video for "Trouble" and the Lovable Scamp EP will be released some time in the coming months, but if you want to see the video early, check out the Folio page under "Video-Editing & Audio Post" to see the video in full!
I hope you enjoyed Behind the Scenes: Allan Purvis - Trouble, and I hope you come back next time to read the next blog post when we get our hands on another project to work on!
Stay tuned and stay safe!
- M3
Comments